Feeds:
Posts
Comments

2008-11-09 MFTDT12 02

I decided to play along in the My Favorite Guest Designer challenge for December.  The challenge is to use a watercoloring technique in my project.

Unfortunately I do not own any MFT stamps. Someday…maybe Santa will bring me a few sets for Christmas.

I decided to make a square card this time.  I have never made one before so be gentle!  He-he!

The flower image was stamped in versamark and embossed in gold.  Then watercolored with an aquapainter and reinkers.  I sponged around the edges with Pretty in Pink and on the corners with Close to Cocoa.  The corner pieces on the main image are Pretty in Pink and Close to Cocoa cardstock stamped with Linen BG in their respective colors.

The Pretty in Pink squares are stamped in Pretty in Pink ink with the leather looking stamp in this set.  Then sponged around the edges in Pretty in Pink and then direct to paper on the edges in Pixie Pink.

The Close to Cocoa squares are stamped in Close to Cocoa with the Linen BG.  Then sponged around the edges with Close to Cocoa.

The Sage Shadow circles are stamped in Sage Shadow with the Linen BG.  Then stamped in Handsome Hunter with the butterfly stamp in this set.  The edges are sponged with Handsome Hunter and they are mounted with foam tape.  The main image is mounted with dimensionals.

This sketch that I used is one that has been bouncing around in my head for a couple weeks.  I finally put in down on paper today.  The card size is 4.25″ X 4.25″ so that it will fit into an A2 envelope.

Sketch by Cyndi 01

Recipe for the card:

Stamps – On Gossamer Wings Stampin’Up!, Linen Background Stampin’Up!

Paper – Georgia Pacific White, Stampin’Up!; Close to Cocoa, Pretty in Pink, Sage Shadow

Ink – Versamark, Stampin’Up!; Close to Cocoa, Handsome Hunter, Pixie Pink, Pretty in Pink, Sage Shadow

Accessories – gold embossing powder, Stampin’Up! reinkers; Certainly Celery, Pixie Pink, Pretty in Pink, aquapainter, square and circle punches, Stampin’Up! grosgrain ribbon

Thank you for stopping by.

Blessings,

Cyndi

Agreenegg Search Tags: Aquapainter & Reinkers, Cards, Challenges, Embossing, MFT Guest Designer, Stampin’ Up!, Techniques, Watercoloring

Good Morning! Well, I have had my half cup of coffee and started on the first 32oz. of the 96oz. of liquids that I am supposed to drink every day. I think I am ready to ‘wax eloquent’. Mbwah! Like that’s ever gonna happen!

But seriously, I am feeling long winded this morning so if you are in a hurry and just stopped in to see the card recipe I posted it first, other wise go grab something to drink, cause I’ve got a lot to say today and a question for you at the end.

NEWSFLASH!!

I used my first ever embossed cardstock on yesterday’s card posted under Challenging challenges.  Okay it’s a huge deal to me. So I’m shouting it from close to the top of this blog post!!

I am posting the picture here again so that you can see the embossing and follow along with the recipe listed without having to go back to the other page. I’m thoughtful that way. 😉  

See…I even put a circle and arrow on the photo to draw your attention to my handy work. Careful now, don’t blow coffee on your monitor.

Here is the card recipe:

Cardstock – Watercolor, Summer Sun, Elegant Eggplant, Always Artichoke, DSP unknown from Dollar store – I picked up a pack of really pretty fall colors one year

Stamps – Flowers for Daisy by Asela Hopkins – Gina K. Designs

Ink – Basic Brown, Always Artichoke, Elegant Eggplant, reinkers; Summer Sun, Elegant Eggplant, Really Rust, Always Artichoke, Lovely Lilac, Bashful Blue

Accessories – Watercolor brush, alcohol, punches, flower & leaves (walmart floral clearance), brad, dimensionals, Zip’emate, flower bracelets for embossing texture

In case you are wondering, I watercolored this image using alcohol with reinkers instead of water. I wanted the colors to remain true and to be more bold, which they are except you can’t see that because all of the cameras in the house have decided to go on strike so I couldn’t get a decent picture!

Breath in…breath out…in…out…Okay I’m back.

EDIT: Rooster Dude taught me how to fix the out of focus look to the photo so now it looks great and all is right with my world!

I stamped the strip of DSP with the leaf spray from the set with Elegant Eggplant. Thinking of you is stamped in Always Artichoke on watercolor paper. The flower and leaves are from a spray I picked up during a walmart floral clearance. It started out mauve but a little work with the watercolor brush and alcohol and reinkers, then dried with the heat gun. Viola! Eggplant faux prima. I’m happy with it. 🙂  The watercolored mat and the Thinking of You tag are popped up on dimensionals.

LOOKEY WHAT I DID!

Now I know that this is going to come as a shock to some of you, but up until a couple weeks ago I did not own a personal die cutting/embossing machine.

103_0029

I could not justify the cost, especially now that I have been unable to work for the past nine months, plus medical bills and meds. Oh, but I have wanted one.

So one morning I looked in the B/S/T (buy-sell-trade) forum on Splitcoast for a machine and there is a Zip’emate posted in my city! It is like brand new – used twice! And it’s oh so reasonable! (This means cheap folks) SOLD – My name is all over it!

Big huge shout out to Jana right now! Hi Jana!! Lookey what I did with it!

Okay so I am now the proud owner of a Zip’emate and I own no dies or embossing folders. Hmm, what to do…I have these bracelets that I bought years ago thinking I could do something with them, five years later I have done something with them! Woohoo!

Here is the Embossing Recipe:

1 – Platform

2 – Bracelets

3 – Cardstock

4 – Embossing foam (black)

5 – Embossing Mat (I don’t think I needed this. I am going to try it again today without it)

Now I’m eyeballing everything in the house as a possible texture for embossing. How fun!

LOOKEY WHAT I WON!

Way back at the end of July I won some blog candy from the very generous Gina K. of Gina K. Designs.  This is my first Gina K. set.  I am so excited!

Flowers for Daisy stamp set 
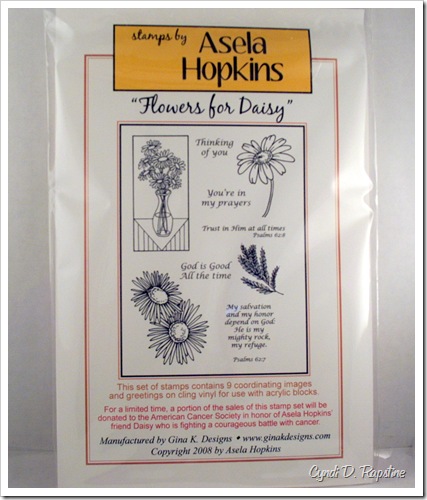
I have to admit that I let this set sit on my craft table for over a month before I finally cut it apart yesterday. Why was I so hesitant? I have never before owned a cling vinyl stamp set. So my big question was do I cut it with the paper backing on or off? I did some searching in the Gina K. Designs Member Company forum on Splitcoast and found where Gina had answered this very question for someone else. Drumroll please….

“The way you use your new Gina K. Stamps is as follows:
Remove the piece of paper that is stuck on the back of the stamp set. It will feel smooth, not sticky. Then, trim the stamps the same way you would with Stampin’ UP stamps. Next, stick them on either an acrylic block or on the back of any stamp that has a sticker index on it. (The cling will stick to the sticker side of a woodmounted stamp, for example- Stampin’ Up stamps)”

I hope it’s ok that I quoted this. If not, I will take it down. 🙂

Now don’t get me wrong, I have cut my fair share of rubber so I wasn’ t scared, but 99% of my stamps are Stampin’ Up. I just really wasn’t sure how to proceed with these stamps. Silly, I know.

I want to say thank you Gina for these awesome stamps.  They really are incredible.

If you guys have never played with Gina’s stamps before you need to get your hands on some to try. I know you hear this all the time, but these stamps feel different. It’s hard to explain, but the rubber feels nicer. There is definately a tactile difference between Gina’s stamps and my SU! stamps rubber-wise.

Also, I have a glass work surface on my craft table and I have never played with cling mount stamps before so that was fun. Before I stuck them to the sticker side of my SU! stamps I was sticking them to my glass work surface and I was amazed at the sticking power of the cling!

I know, I know – simple mind, simple toys. You know, come to think of it that might have been part of my ‘time problem’ last night. Playing with Gina’s new stamps on my glass work surface!

The rest of my ‘time problem’ had to do with 3 cameras, dead batteries in 2 of them, no memory card for the one with juice, dropping my drop light and burning out the bulb when setting up my light box once hubby found batteries for me, not being able to get the camera into focus for the shot – still don’t know why as it took a perfectly focused shot this morning! As I said last night, I believe Mr. Murphy and his laws have taken up residence in my craft room. We shall see….

If you are still here after all of this I have a question for you. Have Mr. Murphy and his laws ever taken up residence in your craft space?

I wish you a glorious weekend!

Blessings,

Mother Hen

Agreenegg Search Tags: Alcohol & Reinkers, CPS Sketch, Cards, Embossing Gina K., Techniques, Watercoloring

Challenging challenges

Well, I’m not gonna sugar coat it…this card just about did me in! I went into my craft room at 1:00pm to make this card for Cammie’s World Alzheimer’s Day Heart to Heart blog candy, Lori’s challenge using the CPS sketch and of course the CPS sketch challenge. A cool 10 hours later I finally have this photo to upload. I don’t know when Mr. Murphy and his laws moved in, but they have taken up residence in my craft space!

Now, obviously I am way too late for Cammie’s blog candy but I am still posting this for a very important reason; My grandfather had Alzheimer’s disease and it was tragic to watch my “puppa” lose his memories, personality and functional skills. Not to mention the toll it took on my grandmother, parents, aunts and uncles.

What Cammie is doing has struck a cord with me and I want to help get the word out.

Do you know what Cammie is doing with 100% of her proceeds from the sale of her newest set through Gina K Designs called Whimsical Autumn?

She is donating them to the Alzheimer’s Association. Not just for this month either, but for as long as the sets are sold. How awesome is that?!!

I am mailing this to the Staff at the Artman Home where Cammie’s grandma lived.

Okay, this is the first time I have participated in a CPS sketch challenge. I really like this sketch. It is very versatile for many types of images. It’s a keeper! 🙂

I’m too tired to post the card recipe now so I will do it in the morning along with a recount of some of the comedy of errors that kept me from getting this card posted sooner.

Blessings,

Mother Hen

Agreenegg Search Tags: Alcohol & Reinkers, CPS Sketch, Cards, EmbossingGina K., TechniquesWatercoloring

Where have I been for the past month and a half you ask?

Trying to decide which piece of furniture is the most comfortable to spend your day lolling around on….the couch or the bed. HA!

No but seriously, the short answer is not feeling well.

If you’re interested the longer, more involved answer is on the page called I’m a Medical Mystery!

I am so thankful for my laptop and wireless internet! I may not have been able to make any pretties myself, but I was still able to visit all of my favorite places and I did try to comment on the days when I could actually sit up for long enough to type. I will admit though that I did not leave my blog address with my comments because I was not posting here and I was embarrassed that I was being a bad blogger.

I’m back into the swing of things, for now though….

Birthday card for my BFF

Birthday card for my BFF

I made this card for my BFF Tammy on her birthday. It is a case of a beautiful card by Leslie Miller. I love to study Leslie’s cards. Her blog is called Running with Scissors and the card I cased is called Silhouette Revealed.

Now in my defense on this card I am not a seamstress. In fact, if it wasn’t for the fact that the sewing machine was already threaded the sewing would not have happened! You see hubby does the sewing on of the scout patches, etc., not me! He-he! So the wonky corners and missing stitches – I lay claim to them, but at least there is thread on this card!

Oh, and the four holes in the corners, that’s because I caught the sewing machine needle on the corner of the card as I was yanking it out of the machine to cut off the huge mass of thread that magically accumulated on the underside of the cardstock like a rootball – what the heck?!! Anyway, I decided to just poke holes into the other three corners to make them all match.

I used the TP Technique on the cameo coral cardstock in cameo coral ink then stamped the butterflies from Beyond Basics in both cameo coral and ruby red. I love the TP Technique it gives the cardstock a nice suede look in real life.

On the old olive layer I stamped French Script in old olive that I stamped off first and then the three leaf stamp from Petite Patterns in old olive. I tore it at an angle and sponged the edges with old olive.

The ruby red layer is also done with the TP Technique in ruby red.

For the main image the flower pot is inked in cameo coral and rocked in really rust. I stamped this three times and cut two of the images out to pop up on dimensionals.

Supplies:

Stamps: Watercolor Garden II, Fun Filled, Friend to Friend, Petite Patterns, Beyonds Basics, French Scripts BG

Paper: Watercolor, Old olive, Cameo Coral, Ruby Red

Ink: Cameo Coral, Really Rust, Garden Green, Ruby Red, Old Olive

Accessories: Corner Punch, swirl copper paper clip, ribbon, thread

Thanks for stopping by.

Blessings,

Mother Hen

(Cyndi)

Agreenegg Search Tags: Cards, Stampin’ Up!, TP, Techniques


Today’s splitcoaststamper’s challenge was ripe with inspiration for me! This card is for the Inspiration challenge #135. We could be inspired by anything from Mackintosh Enamels’ catalog. I chose this pattern, but I wanted a platter instead of a plate. That’s why my “plate” is an oval.

I love the way they display their collections with the background in black at the top that fades to gray towards the bottom, so I tried to emulate that in my card as well.

I stamped my fruit in versamark then lightly sponged Ruby Red ink onto spots of the stamp then onto a sheet of Apricot Appeal cardstock. Then I embossed the fruit images with clear embossing powder. I sponged the Ruby Red ink onto the Apricot Appeal cardstock in varying shades and intensities, darker around the fruit, lighter around the edges, until I achieved a coverage I liked. I cut the oval shape out with a coluzzle.

The black/gray panel was a piece of Sahara Sand cardstock. I masked it in half with post-its and sponged the bottom half with Going Gray. I turned the post-its around and used a Black craft pad to cover the top half with an even coat of Black. I used my heat gun to speed up the drying process.

When I trimmed the black/grey panel down to mat it onto the Basic Black panel I used the trimming flipped over as an accent piece, and I did the same with the gray that I trimmed off the sides.

I drew in a shadow along the bottom right edge of the “platter” and darkened the gray a bit. Added a ribbon and swirl clip.

I still think it needs something, I’m just not sure what.

Supplies:

Stamps: Fresh Fruits

Paper: Apricot Appeal, Sahara Sand, Basic Black

Ink: Versamark, Ruby Red, Going Grey, Black craft

Accessories: SU! Going Grey marker, Clear embossing powder, coluzzle, SU! ribbon, swirl clip

Thanks for stopping by.

Blessings,

Mother Hen

Agreenegg Search Tags: Cards, Challenges, Inspiration, Stampin’ Up!

This card is for the Splitcoaststampers Sketch Challenge #183.

I need to make Thank You cards for Swanson to send out for his graduation gifts. I told him I would make several mock ups for him to choose from. This is the first mock up.

Swanson is an Eagle Scout and I wanted the theme of the card to reflect that, but not look too scoutish.

I stamped the Eagle stamp in Basic Brown on white cardstock and colored with pencils, paper stubs and odorless mineral spirits. Then I stamped the Eagle onto a post-it and cut it out for a mask. I sponged Barely Banana ink in a circle over the Eagle’s wing for the sun. Then I punched a 1 3/8″ circle out of a post-it for a mask of the sun. I applied the sun mask and then stamped the Mountain Range stamp from Yukon end to end using my trusty Stamp-a-ma-jig over the Eagle/Sun masks. I colored the Mountain Range in with pencils, paper stubs and odorless mineral spirits. Then I sponged the sky using a back and forth motion using Bashful Blue and Almost Amethyst inks, leaving the masks in place. I removed the masks and sponged the edges with Chocolate Chip.

I stamped Flannel BG in Mellow Moss on Mellow Moss cardstock and Thanks So Much in Chocolate Chip, then distressed and sponged the edges. I distressed and sponged the edges of a mat of Not Quite Navy for the Mellow Moss panel.

I stamped Flannel BG in Not Quite Navy on Not Quite Navy cardstock, then distressed and sponged the edges. I distressed and sponged the edges of a mat of Mellow Moss for the Not Quite Navy panel.

Mounted these panels onto Chocolate Chip cardstock that I stamped with Flannel BG in Chocolate Chip ink and sponged the edges. Then mounted the main panel in the center of the two panels. Sewed on twine for accents.

Supplies:

Stamps: Yukon, Sincere Salutations, Rubber Stampede – Eagle A821E, Flannel BG

Paper: White, Chocolate Chip, Mellow Moss, Not Quite Navy

Ink: Basic Brown, Chocolate Chip, Mellow Moss, Not Quite Navy, Barely Banana, Bashful Blue, Almost Amethyst

Accessories: Pencils, Odorless Mineral Spirits, Paper Stubs, twine

Thanks for stopping by.

Blessings,

Mother Hen

Agreenegg Search Tags: Cards, Challenges, Sketch, Stampin’ Up!

For some reason that song kept going through my head as I was making this card for my daddy. Today is his birthday! Happy birthday Daddy!!

Happy Birthday Daddy!

This is the second card I have made today for the Splitcoaststampers Color Combinations Challenge #173. I was actually inspired by this card made by E3stamper. This set is one of those sets that came out and I “absolutely had to have it”, but then I just never really used it that much because I have so many others that I had said the same thing about. So when I saw E3stamper’s card I decided to pull out my long neglected set and give it some use.

This week’s challenge uses Wild Wasabi, Purely Pomegranate and Certainly Celery. As I stated earlier today I don’t have Wild Wasabi or Purely Pomegranate, so I had to improvise with Old Olive and Rose Red. I also figured out this makes it difficult to come up with a masculine looking card – go figure!

No designer paper on this one. I am much more comfortable making my own background papers. I stamped Simple Stripes in Rose Red on white cardstock – plain and simple. No sponging, sewing, piercing, nada – remember this is for my daddy.

I stamped Linen in Certainly Celery on the Certainly Celery and Old Olive panels and oval.

The Certainly Celery oval was cut out with a coluzzle then I used my ticket punch with the guide removed to punch out the bite marks. No fancy fru-fru scallops.

The frogs were stamped in Old Olive on the Certainly Celery panel.

I stamped the big frog in Basic Black onto a shimmer white panel. I watercolored him using reinkers and markers. I cut out the oval using a coluzzle.

A clean and simple card that reminds me of a barber shop quartet! What do you think?

Supplies:

Stamps: Frolicking Frogs, Simple Stripes BG, Linen BG

Paper: Shimmer white, white, Certainly Celery, Old Olive

Ink: Certainly Celery, Old Olive. Rose Red

Accessories: SU! markers; Tempting Turquoise, Lavendar Lace, Bashful Blue, SU! reinkers; Certainly Celery, Old Olive, Rose Red, Aquapainter, Coluzzle, Ticket Punch

Thanks for stopping by.

Blessings,

Mother Hen

Agreenegg Search Tags: Cards, Challenges, Color Combination, Stampin’ Up!

Swanson thinks this stamp is weird...I like it!Swanson asked me to make a birthday card for a friend’s mom, Karen. She is very fun loving and easy going, plus the whole family likes cats. So I decided to use this cat stamp from The Cat’s Meow set. It’s playful, and fun and don’t think it had ever seen ink before!

I stamped the image in Basic Black onto watercolor paper and colored it with SU! markers and aquapainter. After the image had dried I went over the water in the fish bowl with glitter glue. I also did the same with myHopefully you can see the sparkle balloon stamp. After the glitter glue had dried on the balloons I cut them out and mounted them onto the watercolor panel with glue dots, then drew the strings with a black marker. I sponged Almost Amethyst around the edges of the panel and mounted to a scrap of purple cardstock from my box of scraps by the pound days.

The Teal panel is also a scraps by the pound remnant that I stamped with Paisley BG in Taken with Teal. The Apricot Appeal strip I stamped with what I call the Sneeze pattern in Apricot Appeal and sponged the edges, then stamped the Bear Paw from Button Bear (still my all time favorite set) stamped off in Close to Cocoa.

The designer paper is from a set that I picked up at the Dollar store, of all places, but the colors were very summery and pretty and the price was right!

Happy birthday stamp from Little Hellos stamped in Taken with Teal.

Supplies:

Stamps: The Cat’s Meow, Little Hellos, Button Bear (Paw & Balloon), Paisley BG

Paper: Watercolor paper, Apricot Appeal, purple, teal, designer unknown

Ink: Basic Black, Almost Amethyst, Taken with Teal, Apricot Appeal, Close the Cocoa

Accessories: SU! Markers; Pumpkin Pie, Close to Cocoa, Green Galore, Temptine Torquoise, Almost Amethyst, Regal Rose, Creamy Carmel, Bliss Blue, Basic Black, Aquapainter, Krystal Glitter Paint

Thanks for stopping by.

Blessings,

Mother Hen

Agreenegg Search Tags: Cards, Stampin’ Up!

I made this card the Splitcoaststampers Color Combinations Challenge #173. This week’s challenge uses Wild Wasabi, Purely Pomegranate and Certainly Celery. Well, I don’t have Wild Wasabi or Purely Pomegranate, so I had to improvise with Old Olive and Rose Red. Not nearly as pretty together, but at least I get to play along.

I also dug out this designer paper that I have had for at least six years. I don’t even remember where I bought it. I bought 3 sheets of it and I still have them. Well now I have 2 and a half sheets. I have never done anything with them because I could never work out in my mind what would look good. And this card for sure didn’t turn out like what was in my mind! But after I had cut my pretty paper I had to use it on the card *sigh*

I also made this card a bit bigger than normal, it is 5.25″ x 6.5″. Stamped the flower outlines and leaves in Basic Brown and watercolored the leaves with my aquapainter. Stamped the inside of the flowers with the flower stamp once full color then again second generation in the Rose Red. Stamped the Butterfly large base in Certainly Celery – stamped off, not full color – then stamped the smaller body stamp in Old Olive full color, then stamped the body outline in Basic Black. But now, after having had time to looking at the card while writing this I think I should have done the butterfly bodies in Basic Brown.

I stamped the Certainly Celery cardstock with Aida Cloth in Certainly Celery and sponged the edges. Stamped the Old Olive cardstock with Aida Cloth in Old Olive and sponged the edges. Punched a circle tag out of part of the main image cast-offs and sponged the edges with Rose Red.

Supplies:

Stamps: Simple Sketches, Painted Posies, Aida Cloth BG, Noteworthy (friend on circle)

Paper: White, Certainly Celery, Old Olive, Black, flowered designer unknown

Ink: Basic Brown, Basic Black, Certainly Celery, Old Olive, Rose Red

Accessories: SU! Grosgrain ribbon, spiral clip, aquapainter

Thank for stopping by.

Blessings,

Mother Hen

I made this card for the Featured Stamper challenge on Splitcoaststampers. Michele’s gallery is a joy to look through and I had a hard time deciding. Here is the card that I chose to case. I kept the layout, tag, twine and twill tape the same. I had to change to stamps, papers and charm as I don’t have those in my stamping stash .

I colored my little guy with pencils and blended with paper stumps and odorless mineral spirits. Distressed the edges of the tag and the white cardstock layer behind it and sponged with Creamy Caramel.

The bottom panel is vanilla cardstock that I swiped my More Mustard ink pad across repeatedly in a back and forth motion to get a wood grainy look. Then I just touched it up with a sponge along the edges. After it had dried I distressed it with a sanding block.

Supplies:

Stamps: Summer by the Sea, Noteworthy

Paper: White, Vanilla, Red & White Generations, paper tag

Ink: Basic Black, More Mustard, Creamy Caramel

Accessories: Twill tape, twine, colored pencils, odorless mineral spirits, paper stubs, starfish charm

Thank you for stopping by.

Blessings,

Mother Hen

Agreenegg Search Tags: Cards, Challenges, Featured Stamper, Stampin’ Up!